I keep forgetting to post this here:
How Fibres are Spun
Interesting!

Monday, October 9, 2017
A Finished Shawl
I finished my shawl at last. It's all blocked and dry so here are pictures, links and details:
Pattern: Lilac Lace Shawl
Yarn: Handspun merino from commercially combed & dyed top
Fibre from Wingham Wool Work
Colour: Yorkshire Rainbow
Wheel: Ashford Traveller
Spun very fine singles for a lace weight 2 ply yarn
750 mtrs 123g. (shawl used 747 mtrs)
Finished shawl (blocked) measures 200 cm wide x 110 cm deep at centre point.


Here's my wee Dora peeking round the corner
I'm very happy with both the spinning and the shawl pattern. I would knit this pattern again, it's ideal for hand spun yarn. I didn't have quite enough yarn and knew I would run out ~ so on the pattern charts I worked row 203 then moved onto row 211 and did the maths to re-align the pattern repeats, this gave me a seamless transition into the final pattern band (for the points).
I've started making sample cards for all of my hand spun yarns, I never used to bother keeping records but I really think it's quite important to do so. It enables me to refer back to how I spun a particular fibre, the finished yarn weight, meterage etc. I use large luggage tags and attach a sample of the single I'm spinning and a mini skein of the plied yarn along with the details of the fibre I have spun:

I also finished off my crochet sock yarn scrap blanket:
It weighs 880g and measures 170cm square, a labour of love considering I'm no crocheter. I used a 2.5 mm hook and tried to stick to brights and bolds:

So now I find myself left with all the neutral toned sock yarn leftovers~ I'm thinking there may be another blanket in due course!
Wednesday, October 4, 2017
More Dyeing and a Hand Knit Shawl
I dyed up some more fibre a few days ago. Firstly the last of my superwash merino combed top, in shades of purples, pinks and grey toned blues, 300g:

Then I dyed some Falkland combed top in shades of golds and peachy tones:

I've started spinning the Falkland fibre up today:

It's quite soft and I'm enjoying working with it, it's the first time I've used Falkland. Spinning it on my e-spinner (which doesn't get enough use).
Good progress this week on my shawl, I'm down to the last few rows of the pattern but I know I will be short of yarn so I'm currently trying to fudge the pattern finish lol:

Wednesday, September 27, 2017
Hand Dyed Combed Top
I dyed up some combed top I've had lurking around for years. It's superwash merino, the thing is with superwash it grabs the dye very very quickly. That's why I decided to spot dye it. You just literally drop blobs of dye onto the fibre in the pot and leave it to cook. Don't poke it or mess with it, just leave it alone.


Spinning this as a fractal yarn: divide the top into 2 lengthways then spin the first half onto bobbin 1. Split the remaining half again into 4 strips lengthways and spin them onto bobbin 2, one strip after the other but keep them in the same orientation as the first.
Just loving the purples and blues in this, leaving large white areas when dying the top tones down the colours, so deeper strong colours become multiple, softer shades as they blend with the white during drafting.


Now when I first started spinning, about 6 years ago, I would never have dreamed of buying something that looked like this:

But, the strangest looking thing can often become a thing of beauty:

Spinning this as a fractal yarn: divide the top into 2 lengthways then spin the first half onto bobbin 1. Split the remaining half again into 4 strips lengthways and spin them onto bobbin 2, one strip after the other but keep them in the same orientation as the first.
Just loving the purples and blues in this, leaving large white areas when dying the top tones down the colours, so deeper strong colours become multiple, softer shades as they blend with the white during drafting.

I'm spinning this much thicker than I normally do as I'm wanting a worsted weight yarn.
I also decided what to knit with my Green Green Grass of Home skein:

A lace shawl, it's triangular and knitted top down with lace and garter stitch panels. The pattern is Lilac Shawl by Irene Lin.
Tuesday, September 26, 2017
Finished Yarn.... and 1 hour Hats
Well, I finally finished spinning my Yorkshire Rainbow Merino:
 123g
123g
750 metres
100% merino
2 ply lace weight yarn
spun on my Ashford Traveller wheel
Feeling very happy with this yarn, just got to decide what to knit with it.
 I made these 3 adult sized hats over the weekend. They are knit from a super chunky 100% wool yarn.
I cast on 44 stitches, joined for knitting in the round and knit 6 rows garter stitch for the brim. For the square hats I just continued knitting straight until I had enough yarn left to do a 3 needle bind off. The skeins were 100g and 60 mtrs each. My gauge was 10 sts & 14 rows to 10 cm.
For the beanie type hat I worked 10 rows in stocking stitch then began shaping by working knit 7, K2tog all around. All the alternate rows were knit. Next row K5, K2 tog and so on until the last round was K2tog all around. I made a pom pom out of the leftovers. These are good winter hats, but not needed here at the moment as Spring has properly sprung:


I also finished off my crochet blanket, which is drying at the moment. I will post pics next time!

750 metres
100% merino
2 ply lace weight yarn
spun on my Ashford Traveller wheel
Feeling very happy with this yarn, just got to decide what to knit with it.

I cast on 44 stitches, joined for knitting in the round and knit 6 rows garter stitch for the brim. For the square hats I just continued knitting straight until I had enough yarn left to do a 3 needle bind off. The skeins were 100g and 60 mtrs each. My gauge was 10 sts & 14 rows to 10 cm.
For the beanie type hat I worked 10 rows in stocking stitch then began shaping by working knit 7, K2tog all around. All the alternate rows were knit. Next row K5, K2 tog and so on until the last round was K2tog all around. I made a pom pom out of the leftovers. These are good winter hats, but not needed here at the moment as Spring has properly sprung:


I also finished off my crochet blanket, which is drying at the moment. I will post pics next time!
Friday, September 15, 2017
Friday .....there's a Fleece
I haven't done any knitting over the past couple of weeks, none at all. My bit of spare time has been taken up with other things such as:
I'm supposed to be reducing/sorting out my fibre and yarn stash, but I succumbed last week and bought a part fleece. Only the teeny tiniest amount of just over 1 kg. I just could not resist it! It was a beautiful fine Romney, the raw locks measured 20 cm and it's the most beautiful brown/black colour. Soft and squishy.
The locks before washing, loving that crimp!


Here's the first batch of nests that I combed.

More combing, the lighter coloured fibre in front is also Romney. It's a fleece that I almost threw out, it came with the first spinning wheel I ever purchased 10 years ago and had been very tightly compacted into a cardboard box. In the end I picked out the best and threw the worst of it. It washed up quite well after 3 hot soaks ~ the fibre was very compacted and dirty. It's not as fine as the dark brown fleece and there's a lot more of it, but I think the 2 colours look lovely together, it's destined for a colour work project. The light isn't doing the dark brown justice on this photo.

Heres a small sample of the washed and dried locks that I spun up after combing them. The one on the left is a 2 ply yarn and the small skein on the right is a 3 ply (navajo) yarn. I like them both and I'm having a hard time deciding which one to go with.

Here's a peek at something else I've been working on recently ~ a crochet blanket using up scraps, odds and ends, and orphan balls of sock yarn. I'm using a 2.75 mm hook. The blanket is getting quite large and heavy now so I think I'm going to have to stop soon!
I finished the flax sweater for my Husband a few weeks ago, he's very happy with it and it's been worn many times already, it's very warm yet light and squishy:

I love the garter stitch bands on the shoulders/arms. If I were to knit this sweater again I would do short rows at the back of the neck to bring it up slightly, knitted as per pattern the back and front of the neckline is identical:

Monday, August 7, 2017
Magic Monday....
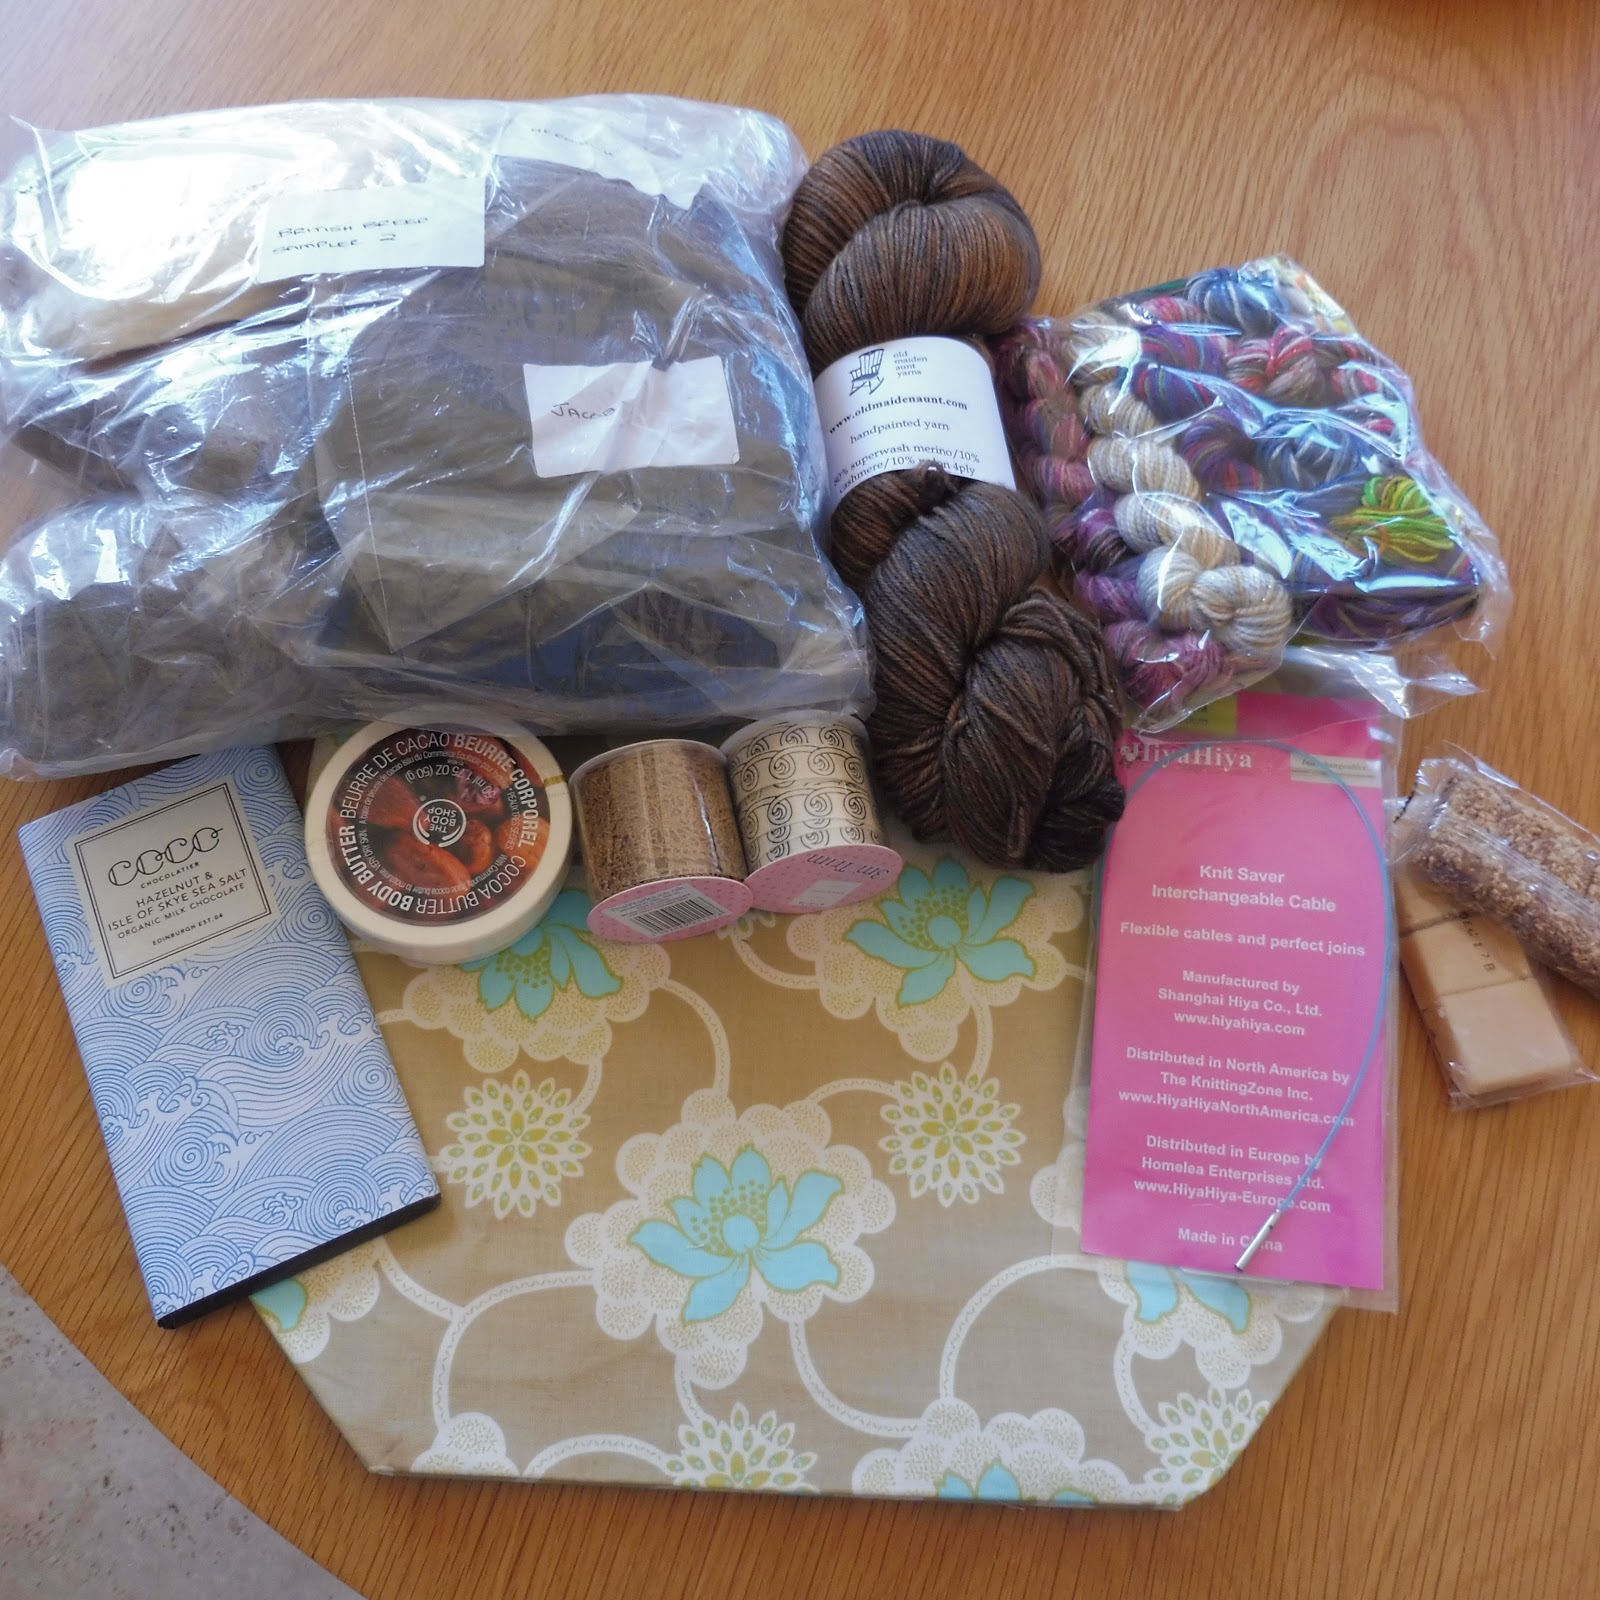
I've been taking part in a swap group on Ravelry for about 9 years now. Today I received a swap package, I had chosen a neutral palette as my colours.

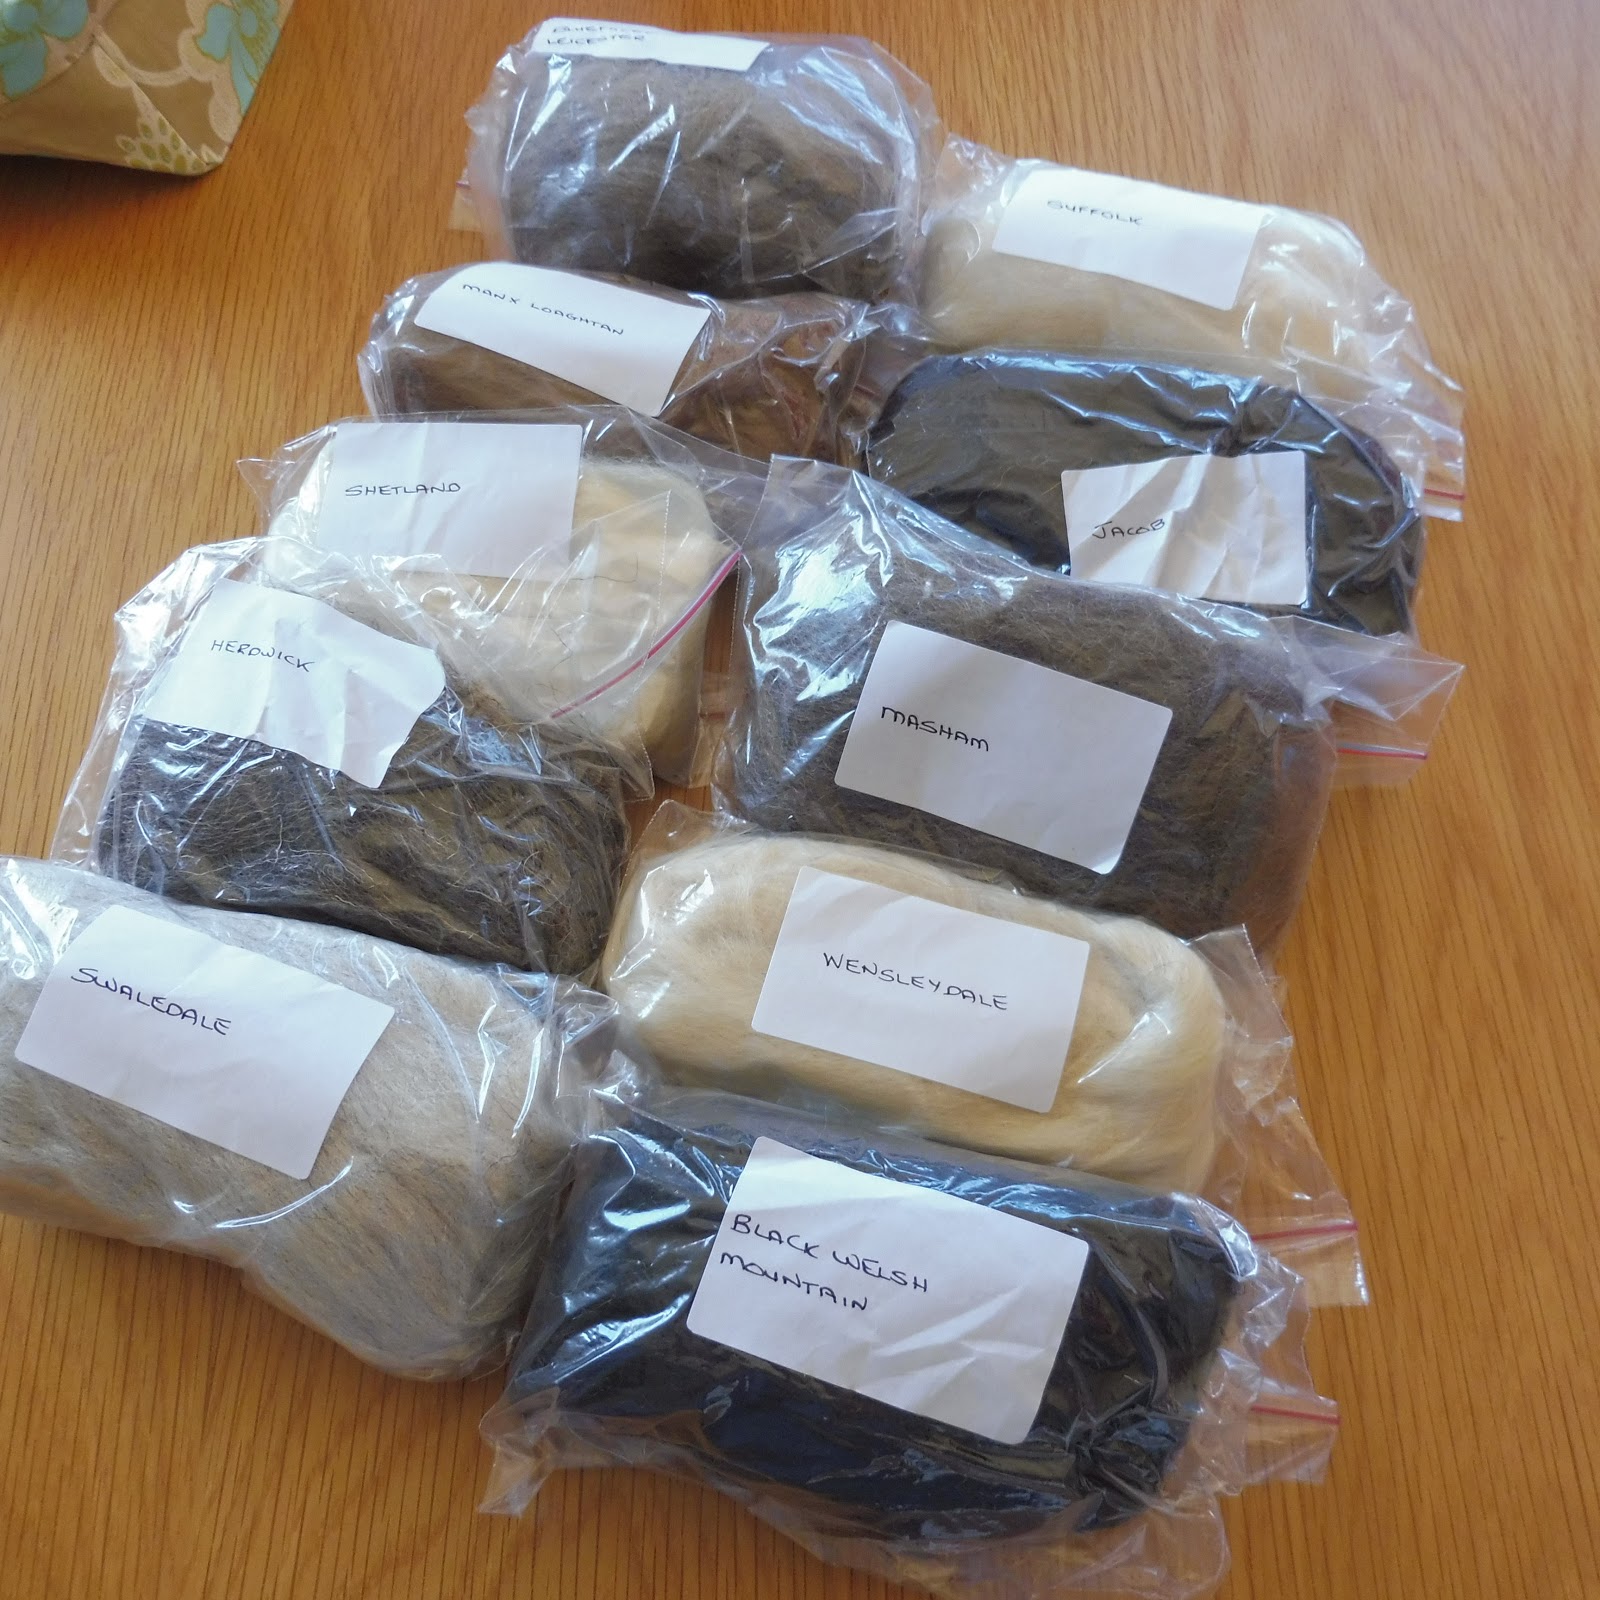
My secret swap partner was from Scotland and she sent me a beautiful skein of Old Maiden Aunt cashmere blend sock wool along with a British Breed Fibre Sampler pack. I'm really looking forward to spinning all of these different fibre samples very soon.
A zippered project bag, some mini skeins of sock yarns, hand cream, a new cord for my hiyahiya needles and some wool wash samples. Ribbon and lace and yummy treats (chocolate, tablet and macaroon) completed the package.
 Blue Faced Leicester
Manx Loaghtan
Shetland
Herdwick
Swaledale
Suffolk
Jacob
Masham
Wensleydale
Black Welsh Mountain
This is going to keep me busy for a while!
I've also started knitting a sweater and a hat for my husband. The sweater isn't actually that far from being finished:
 The yarn is Naturally Drift, a 100% merino yarn. It's very soft and lightweight and I'm really enjoying knitting with it. The pattern is so simple, a top down raglan with a bit of garter stitch detail down the sleeves.
The pattern is called Flax.
I'm loving the way my grey hand spun is knitting up into this simple stocking stitch men's hat. Not that we need hats today, it's just like a beautiful Summers day here.

My secret swap partner was from Scotland and she sent me a beautiful skein of Old Maiden Aunt cashmere blend sock wool along with a British Breed Fibre Sampler pack. I'm really looking forward to spinning all of these different fibre samples very soon.
A zippered project bag, some mini skeins of sock yarns, hand cream, a new cord for my hiyahiya needles and some wool wash samples. Ribbon and lace and yummy treats (chocolate, tablet and macaroon) completed the package.
Manx Loaghtan
Shetland
Herdwick
Swaledale
Suffolk
Jacob
Masham
Wensleydale
Black Welsh Mountain
This is going to keep me busy for a while!
I've also started knitting a sweater and a hat for my husband. The sweater isn't actually that far from being finished:

The pattern is called Flax.
I'm loving the way my grey hand spun is knitting up into this simple stocking stitch men's hat. Not that we need hats today, it's just like a beautiful Summers day here.

Subscribe to:
Posts (Atom)